It’s been a little while, time for some updates on the cover for the Warlock Diaries. I’m well into coloring this guy, but I need to organize the screenies I’ve been taking. I’m hoping to be able to make a post about that part that actually makes sense. I sort of shut down when I’m coloring, it’s my zen.

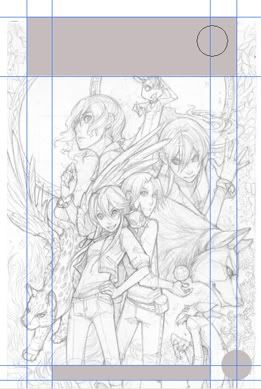
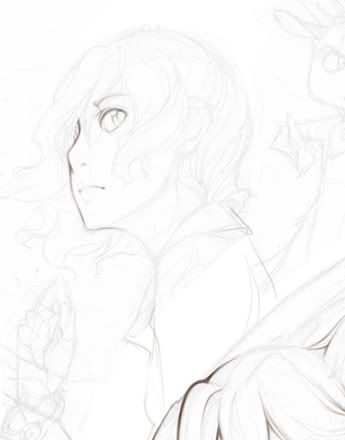
So here’s the drawing pre-feedback, as it was sent in, fully ready to be collapsed and restructured should the need arise. That’s how it goes! In the past, we’ve even finished the entire cover only to go back in and do it over again completely. It’s actually pretty neat to get to see the before and after, but it is time consuming to the extreme. Because I am a slow colorist to the extreme. But! Good news, that won’t be necessary. This sketch did fine. So far the concerns have been about making Kara and Donovan’s sizes match Emily and Adriane’s more, and regarding the lack of ….sparklies.
Sparklies?! in my Avalon art?!?
Oh, yes. There will be sparklies. Sparklies, there will be. Train of thought.. Hi! Okay anyway so that was the first bit, and that’s not so bad. We’ve got the power of Photoshop! More importantly, from the get-go I had been observing the wrong format. I’d drawn this cover along the same size dimensions as the novels, not realizing that the Manga was going to be different. D’oh!
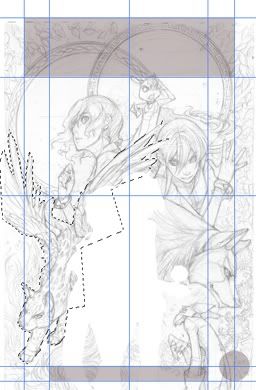
I opened a blank document in the correct size, and used the rulers in Photoshop to divide it up based on where all of the text information was going to go, approximately. I have the first volume in the Warlock Diaries, so I measured that one IRL and just replicated it in my computer. I shadowed those places in, so I wouldn’t accidentally stick somebody’s head in there during the great rearranging.
Yup, Ozzie’s cute little ears are in danger. No good! We can’t just make the front two characters big, either. The changes to be made here will need to occur over the whole sketch in order to maintain balance within the new dimensions. I cut the whole thing apart.
This is one of those times I wish my tablet were slightly less sensitive on me. I traced around each character roughly with the polygonal lasso tool, cut them from the sketch, and pasted them on their own layers so I could transform (cntrl+t) each portion of the composition as needed. It just needed to be sorta ballparked; with this method you have to accept that some areas are going to get covered, and some things are going to need to be added. The important thing is that everyone still fits and respects each other’s space.
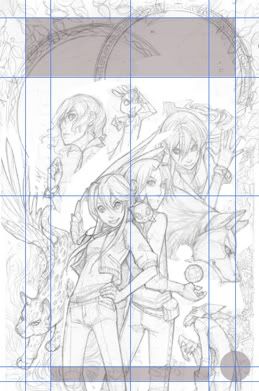
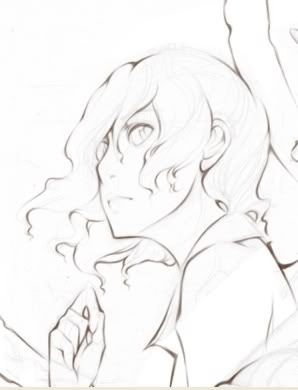
After much wiggling around, this is what gets to go to inks. The only part here that leaves me sorta ‘eh’ is where Lyra’s wing is riding right on Kara’s bangs.. I don’t like those edges meeting like that. The kitty cat’s wings are going to get fancier, so for the time being, I’ll leave that as is. Inks must happen! *shudder *
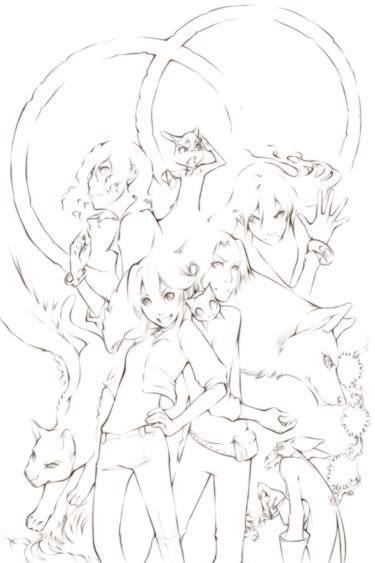
Go go gadget lineart sort of! I use Open Canvas 4+ to ink digitally. Photoshop does make for a silkier, more solid line, but it also takes about 3 times longer in my hands. OC just feels more like tools, and boy does it come with a lot of them, except I think I only use this program for the pencil tool. Honest. The thing is the most genius instrument of digital art making ever designed. I want to marry it. You can graze the surface of your tablet to build up a mark on screen, and you can also make it extremely wide, so it’s not just a teeny point.
My linework acts like a stabilizer, it’s not exactly useful on it’s own. It lacks most of the sketch’s original detail and it’s confusing to look at. It’s pretty gross, but it best supports the way I use watercolor, which was influenced by the way I color digitally. Since it works so well on paper, I started trying to replicate the look in open canvas whenever I’m cornered into inking something digitally.
Pencil tool to the rescue! I don’t really know how to describe this other than make a new layer over the sketch, think ‘brush’, and go with it. It feels pretty natural, except you don’t have to stop to re-water/ink, and it never gets scrumbly (that thing where you run out of water and it.. yeah.) Corners melt together and keep rolling. Angles are deliberite, lines fade to finish and never stop abruptly. Continuity is key, keep it thick and soft.
I finish my lineart by duplicating its layer back in Photoshop, and blurring the bananas out of one of them before merging them together again. I just don’t want it to come out too sharp or too strong, it’s going to sit on top of the colors awkwardly. This needs to melt into them and guide their edges, entire sections will probably get blended straight into the painting later.
More very soon, thank you for reading! :3
I love that you have a blog now! Thanks for posting, I loved the read as always, haha. Hate it when I design something to the wrong dimensions D:
ReplyDeletelovely stuff as always!
ReplyDeletewhat resolution do you keep your line art at?